


Camp Miller Kitchen Renovation Series
Part 1
There’s an old adage (I’m not sure where I heard it, or if it’s old, or if it’s an actual adage), that goes something like this: ‘Whatever your renovation timeline is, double it.’ The DIY kitchen remodel at Camp Miller is no exception.
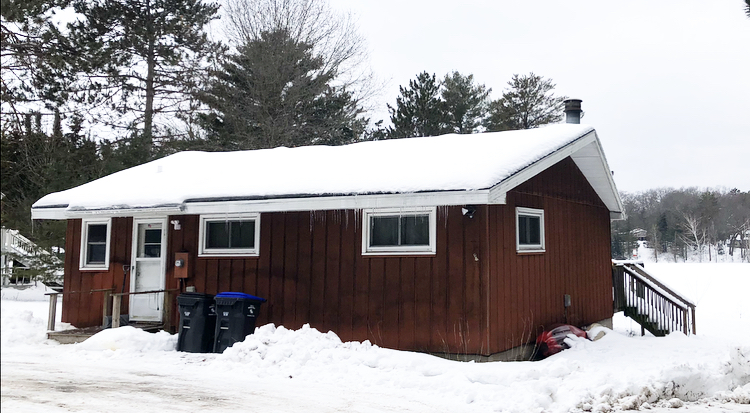
When Matt and I bought our lakefront cabin in Shawano, WI, I confidently announced that we would renovate over the summer. Our plan was to rent it through Airbnb, and I hoped to have vacationers in by August. Luckily, Matt laughed in my face and suggested we give ourselves a full year.
Turns out it can take 1 year and 1 month to renovate an 800 sq foot cabin. And of all of the factors that go into renovating (like budget, materials, skill level, contractor availability), time was our biggest player.
In part one of the Camp Miller Kitchen series, I’d like to paint a picture of DIY in real life. A before and after photo is immensely satisfying, but instead I’d like to dig into that messy space in between.


Renovation Timeline
For the first month after buying Camp Miller, we stayed home and did zero projects. We had a pretty good excuse, however. Our son, Miller, was born on the same day we signed the deed (I went into labor on the car ride home from closing, no joke).
The first time we visited the cabin as a family of three, it was an honest-to-god nightmare. It takes a long time to pack up for a day trip with an infant, so we left way behind schedule. About 15 minutes into the one hour drive, Miller needed to nurse. Nursing was a challenge for me, and I was still holding out on formula. So we pulled over to the side of the road, and I did my best to nurse Miller in the backseat. Another 30 minutes later, we got back on the road.


By the time we got to the cabin, I needed to pump. Miller had fallen asleep, so we brought him very carefully inside. For the first 45 minutes of our big renovation day, I rocked Miller and pumped while Matt walked around kicking at stuff and poking things.
Once I finished pumping, I was so excited to dive in! I started taking down old curtain rods and doing some general clean up.
I think I was about to remove curtain rod number three when Miller woke up.
Time for a renovation break.
I wrapped him up in my Moby and we followed Matt around while he lugged old stuff out of the cabin and into a trash pile.
This first day carried on in a similar pattern until it was time to head home. Feed Miller, get him to sleep, pump, pull down a curtain, go get Miller who just woke up.
I remember being exhausted on the drive home. Before having a baby, both my hands had been free all of the time and could accomplish many things quickly. Now, my hands were needed elsewhere. I looked at Miller as he slept in the carseat and realized that I knew NOTHING about what the next year would bring. Would I ever be able to do projects again? Did I even want to? Because that’s the funny thing about becoming a mom- all of my priorities looked different. That day, and for much of the next year, I felt a strange mixture of joy, love, exhaustion, frustration, desperation, and amazement.
Thank God Matt had the sense to carve out a year for this renovation.
Setting Project Priorities
The 4 Square Method
Each renovation comes with a different set of priorities. Time ended up being our most important factor. But for others, budget or skill level might weigh most heavily.
It’s important to think about your priorities before diving into renovations. I created a one-page scratch pad to help guide me through this thought process. You can have it, if you’d like! Enter your name below and I’ll send my 4 Square Method to your inbox.
There are 4 key factors that tend to influence a renovation and my design decisions. Those areas are:
- Budget: Consider a few things here.
- How much cash do you have access to or how much can you borrow?
- What is your estimated ARV (after repair value)? Does that make sense given your area and market?
I see a lot of people not only blow the budget on a renovation, but they might also OVER-improve their home. I don’t think that’s wise, even if you plan to stay in your home forever. Real estate can be a HUGE asset… don’t turn it into a liability.
If you’d like to know the basics of estimating ARV (After Repair Value) and running a CMA (Comparative Market Analysis), join the wait-list for my resource on this topic.
Real estate can be a HUGE asset… don’t turn it into a liability.
- Timeline: Is there a length of time the project MUST be completed in? Or is your timeline based on when you’d LIKE it to be completed? These are two very different things. A firm deadline might mean:
- Phase A of the project must be completed by a certain date so that Phase B can begin
- You are working with a handyman or contractor who has limited availability
- Your project is part of an investment strategy, so for financial reasons it must be completed by a certain time
If your timeline is a wish list item, why don’t you go ahead and double or triple your estimation. Life happens and we are all busy. If there’s no external accountability for your project, give yourself a little grace with a shot of reality and extend your timeline.
If there’s no external accountability for your project, give yourself a little grace with a shot of reality and extend your timeline.
- Skill Level: Assess the scope of work and honestly ask yourself two questions:
- How much do I already know how to do myself?
- How many other projects am I willing to learn?
I am generally open to learning new things. However… as busy adults and parents, I also believe we should take some pressure off of ourselves. While I’m confident I could learn how to do most home renovation projects, I have to be realistic about how much time and energy it takes to learn new things.
Sometimes, it just makes better sense to hire a guy.
- Amount of Collaboration: How much help do you plan to get on this project? Will this help come in the form of hired professionals, or kind family members who accept beer as payment?
A tip for working with friends and family: get your crap in order before they come over to help. Have all necessary tools and materials ready to go. Do as much prep/demo work ahead of time as you can. Have a plan and communicate it clearly. Have a vision and show inspiration photos, so all parties know what the intended outcome is.
Look for another post soon detailing tips for hiring contractors and handymen!
Hopefully you find this 4 Square Method helpful. It’s a very simple planning process and the entire thing fits onto one page. This isn’t your design plan- it’s your pre-planning. I cannot recommend enough that you engage heavily in the pre-planning process. I am confident it will help your renovation run more smoothly!

The Camp Miller Kitchen Renovation
Overview
So now that we’ve all laughed at my initial timeline, and I’ve shared the importance of pre-planning a renovation, let’s get into the details of the Camp Miller Kitchen remodel.
The Cabinets
On that first ‘renovation’ day, I grabbed three drawers and deep cleaned them (soap and water with a little bit of Goo Gone). Then I tested four or five different combinations of colors by mixing left-over paint. The combination I ultimately chose features:
- 2 parts- Foxhound Green
- 1 part- Deepest Earth Green
- 1 part- a silver blue color that I can’t remember!


Renovation tip: keep an electronic file of all your favorite paint colors, along with notes about where/when it was used, special application notes, and a link to the paint type used (ex: Behr or SW or Glidden, semi-gloss or matte).
The Walls
Since my paint mixture contained paint and primer, I rolled the cabinet color directly onto the wallpaper panels. If you are working on unpredictable surfaces like this, I recommend priming at least 1-2 coats prior to any paint application. I’ve already had to touch up multiple areas.
Later on, I created a board and batten style wall treatment using leftover trim pieces. I used a combination of 1×4 pine for the wall/ceiling joint and screen molding for the vertical strips. Originally, the wallpaper boards (or gypsum boards, commonly used in mobile homes) had joint seams that were either gaping or broken. My painted screen molding strips helped correct that issue.

Next week, I’ll share details about these other kitchen features:
- The ‘Vent Hood’
- The Appliances
- The “L”
- The Countertops
- The Lighting
Look for parts two and three in the Camp Miller Kitchen Series, coming soon. I will be sharing relevant tutorials, a breakdown of the tools used and skills needed, a deeper dive into my design choices, as well as a Q&A from readers.
Which reminds me… what questions do you have? Write them below in the comments or find me on Instagram. You can also join my Facebook group “How to DIY Your Home Renovation” where together we are cultivating a community dedicated to answering each other’s questions and sharing our proudest moments as DIY-ers.
Have you joined my email list yet? Please do! This is DIY Home School’s most sacred space.
Thanks for reading and good luck DIY-ing!
Such a cool reno!! Might be a dumb question, but what is screen molding? 😅
Thank you so much! Screen molding is thin, somewhat flexible trim strips. They’re intended for holding mesh screening into wood screens, but are also good for various trim needs 🙂 This is what we used: https://www.homedepot.com/p/HOUSE-OF-FARA-1-4-in-x-3-4-in-x-8-ft-WM142-Oak-Wood-Screen-Moulding-9559/203116459