


How Hard Can It Be to Tile Kitchen Backsplash?
Truthfully, not that hard.
My vision for the kitchen backsplash at Little River House did not (apparently) exist. I looked all over design books and Pinterest. The closest I could find to a look I loved was no backsplash. I love the minimalism of a plain white wall, warmed by elements such as wood counters, brick accent walls, and gold fixtures. (*See the images below- they link to my design inspiration page)
Alas… when we stripped the old tile backsplash, it left behind a ton of chunky residue. The walls were completely scarred. If I wanted the “no backsplash” look, we’d have to either replace the plaster (yuck) or try to sand it down enough to paint over. This didn’t seem possible, so as with all of our Little River House projects, we got creative out of necessity.


Problems with Tile and Shiplap
Aside from the “no backsplash” look, I also considered white tile or shiplap. Two things:
- While I loved the look of tile from counter to ceiling, it would not fit into our budget. I even ransacked Habitat for Humanity Restore to try salvaging white tile. If I had unlimited time, this may have been possible, but I was getting antsy to start.
- Shiplap is gorgeous, but it’s actually quite thick and cumbersome. I was hoping to find something thinner and more flexible to work with, so I didn’t end up with super thick walls jutting out over the countertops.
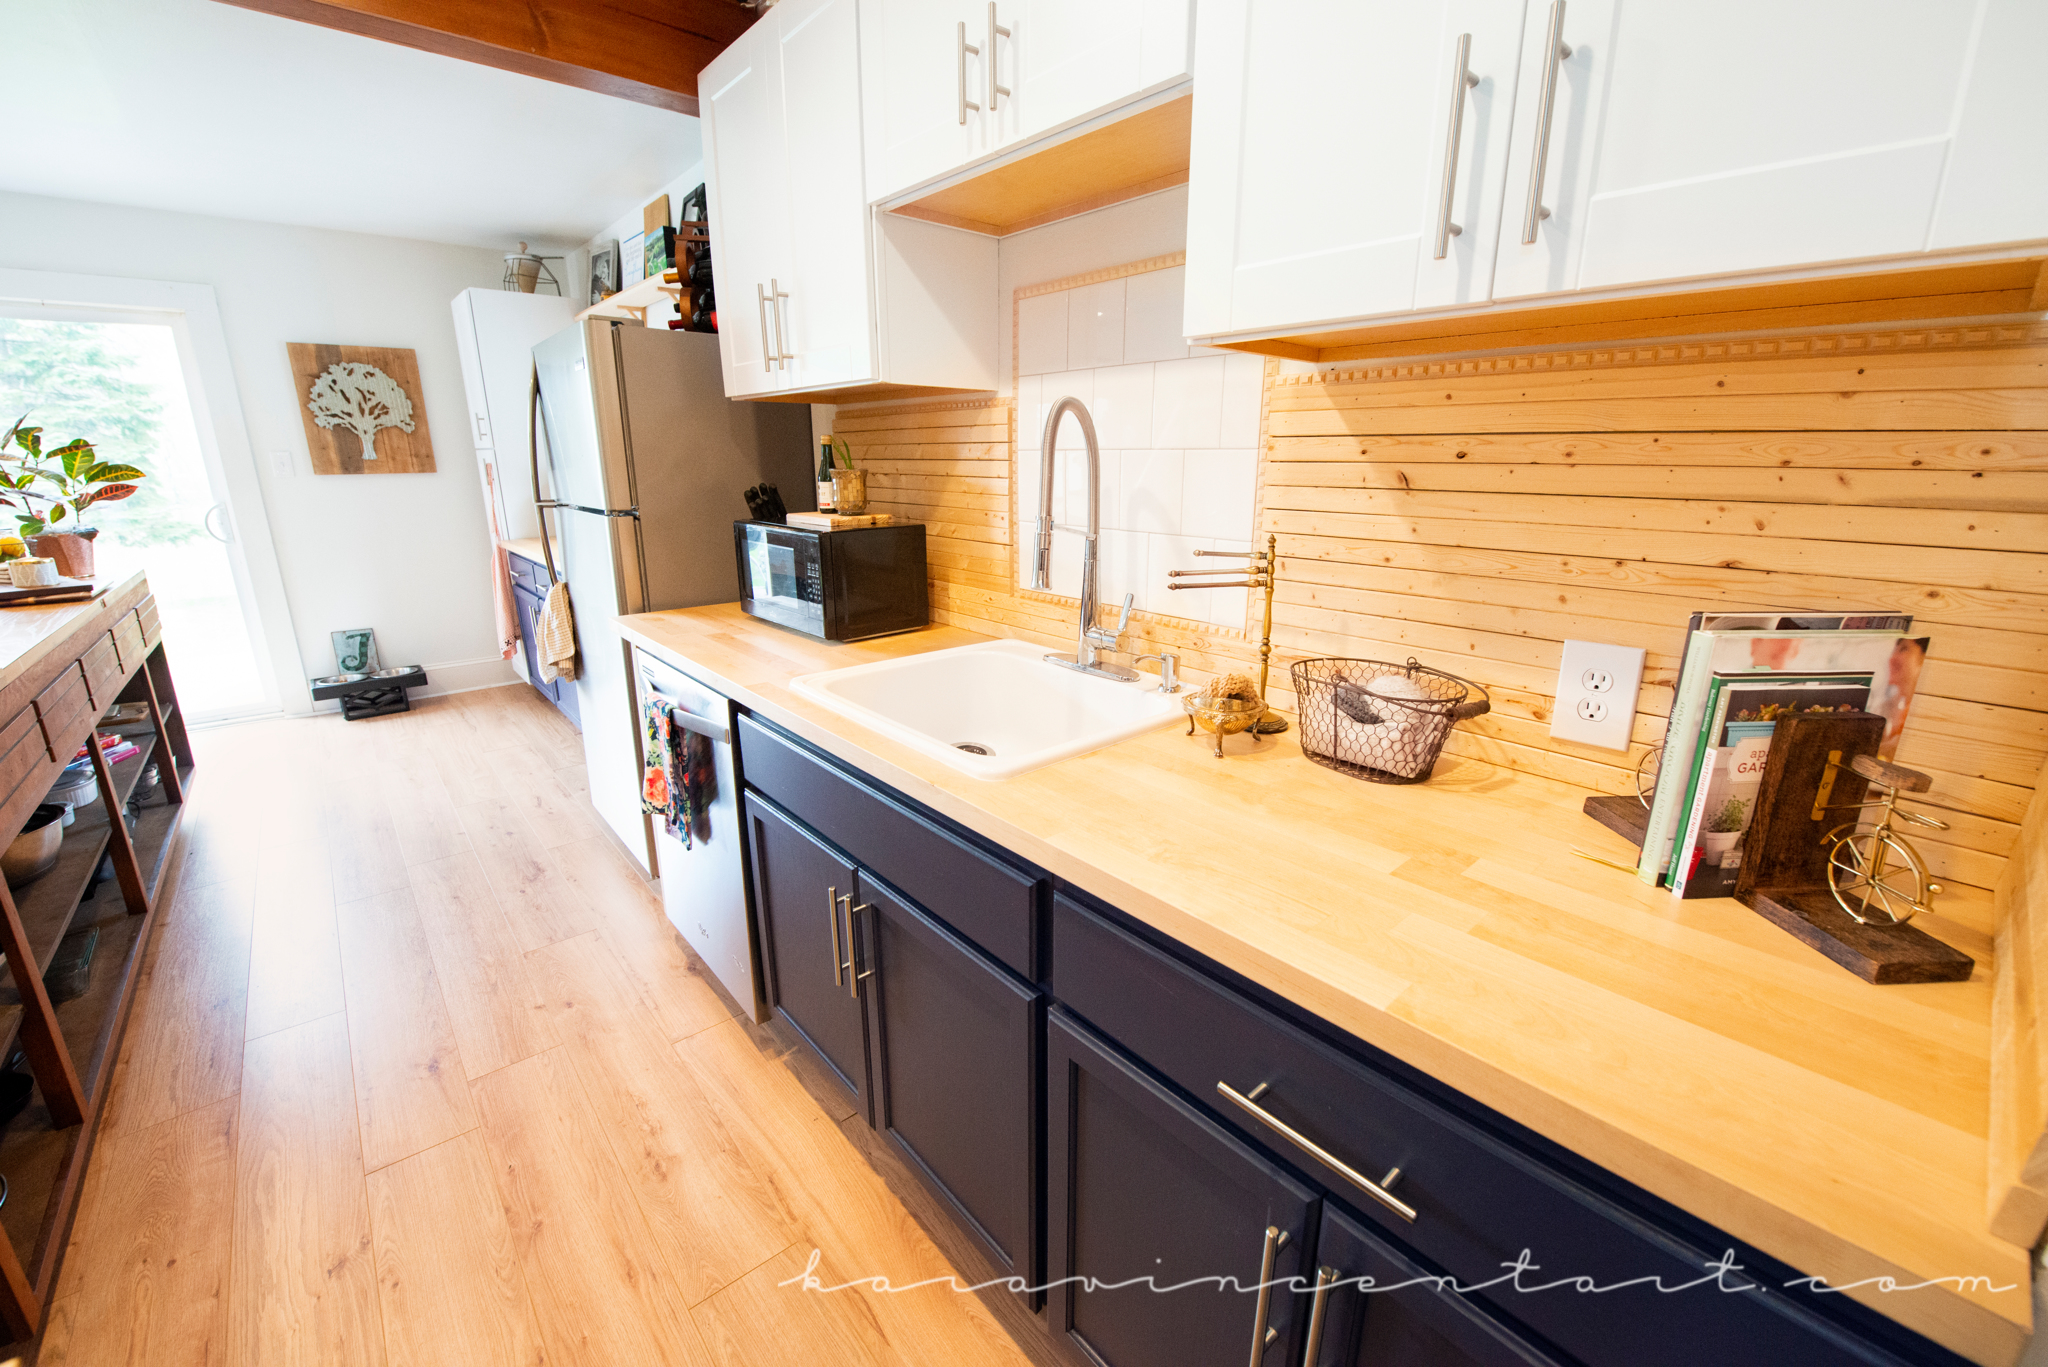
In the end, I came up with a combination of square white tile and furring strips. Before I dive into that, let’s take a trip down memory lane and remind ourselves what the kitchen walls looked like before.

Before: Kitchen Walls
After stripping the old tile off of the plaster walls, this is the residue we were left with.

Before: Kitchen Walls, Sink View
Tiling this entire wall from counter to ceiling would have been expensive. We needed to create a backsplash to cover the ruined walls.
The Design Plan
Here’s a look at my rough design (what’s the expression about even the best-laid plans….. ?) Fortunately, once it came time to plan out the tile placement, the math was nice and easy. The finished product may not have turned out exactly as envisioned below, but I guess I wasn’t really expecting it to. For the first renovation, I’m proud of the result, and of the work, we put in! See my renovation page for more before and afters.


How We Tiled Our Kitchen Backsplash
The steps are simple and easy to follow. Here’s how we tiled our walls, from start to finish:
Map Out Tile Like a Grid
First, I mapped out exactly how many tiles I’d need based on a standard 6″x 6″ tile. Cleverly, I needed to cover a 30″ span. That’s math I can do! I also drew out a decorative square for above the sink. I don’t know why. The idea just popped into my head, and I was like… yeah, ok, let’s do it.
Rent and Buy Materials
The last stage of prep was to purchase materials and rent a tile cutter. We ended up going with a mini version, since it was a fairly small job. It worked just fine! (*Hint… don’t use a manual tile cutter. Not that we tried one; they just look fussy and power saw rental is not much more expensive).
Start Cutting!
Watch us get excited about our skillz. Pay special attention to Matt’s flourish at the end of each tile cut.
Apply the Mastic and Tile
Using a trowel, I applied the mastic to the wall. I worked on a few square feet at a time, as I didn’t want this “tile glue” to dry too quickly. I spread the mastic horizontally, in level, straight lines. Some improvement shows feature mastic applied in big sweeping circles. The issue with this method is it allows for more air bubbles underneath the tile, weakening the bond. There are many helpful videos online that can teach you how to apply tile correctly. We did our research before diving in!
Once the mastic was on the wall, I gently “squished on” one tile at a time. It’s like a very gentle wiggle. You don’t want to push the tile too firmly to the wall, or all of the mastic will be displaced. And a little wiggle of the tile helps to ensure all of the back side is covered with the tile adhesive.
We actually drilled a straight edge board onto the wall, just below where our first layer of tile would go. This gave us a level line to work with. You want to make sure that each line of tile is level. Check often! Once the mastic dries, you’ll have a hard time re-arranging anything.
Also, be sure to use spacers in between every tile (on all four sides). Maybe pros don’t need spacers, but as I am not a pro…
Apply Grout
Once all the tile was up, we waited 24 hours before applying grout. Read the back of your tile adhesive bucket. It will indicate dry time. Grouting was the last step- and my absolute favorite thing ever. It’s hugely satisfying to see that color go on in neat little lines between each tile. If you have OCD tendencies, I would anticipate you are a natural-born grout-er.
The grout goes on with a grout float. I worked in small-ish sections (maybe 3′ by 3′) and sponged off the excess grout as I went. Most tutorials online say to apply all of the grout and wait 15-30 minutes before sponging off. I didn’t wait, because I loved seeing the clean white tile immediately. The project went just fine. BUT, next time I’ll let the grout set a while before sponging, as I think it will be more efficient.
Presto! Project Done
After making the plan and gathering the supplies, this project went quickly. The tiling itself was maybe 90 minutes. The grout went on 24 hours later and dried for 48 hours.
If you are deciding which parts of your renovation to tackle yourself vs. which to pay someone to do…. tile is definitely DIY.
And seriously, call me when you understand the utter satisfaction of grouting. The feeling of calm and wholeness is on par with raking the sand in your zen garden. Not a joke.
Good luck! And much love,
Becca


(More photos of the tiling process)


I love the look and livability of tile, but have always been intimidated by the idea of doing it myself. You make it seem easy and fun. I can imagine how super-satisfying it is to see a wall go up in a couple of hours. Hmmmm, maybe someone like me CAN do it!